Thursday, June 13, 2013

The Tree

A few months ago, I went to lunch with my coworkers and we wound up at this fancy drugstore near our office. You've heard about adventures like this before - say, back when I bought myself a slap watch. Although I didn't have a budget, and although I really didn't have a need, I bought myself a necklace. It was a dark silver color and had a cut-out tree on it - definitely not fine jewelry! For $13, I left the shop a happy woman. I thought I was going to like it, and as time passed, I realized I had underestimated just how much I would like it. I wore it with work clothes and casual clothes, basically everywhere I went. I wore it so much I never even took a photo of it! But, thanks to the wonders of the internet, I found a link to a similar one on Amazon, if you want to see. Just imagine it in a darker color.
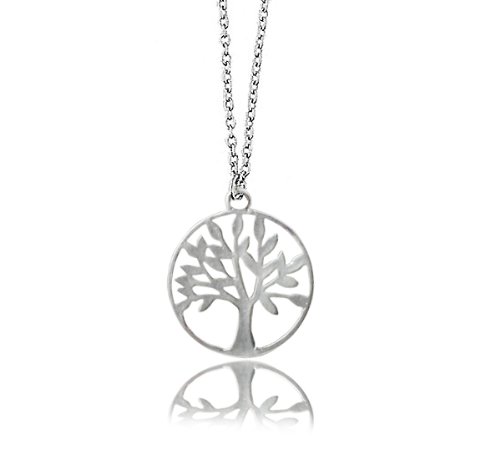
So, one night, I wore the tree necklace out to a social function and when I got home, I realized I didn't have it any more. I spent a couple of days double-checking my pockets, looking at the floor of my car in case it had fallen off while I was driving, but all to no avail. The tree necklace was gone.

After that, I started thinking about how to replace it. I went back to the fancy drugstore, but the tree necklaces were gone. I also did some internet research, but I hesitated. The necklaces I found for sale online were more expensive than the one I'd bought in person, and were going to be subject to shipping charges. Woof.

Then, I found myself in the jewelry making aisle at Michaels. I know I was looking for something else, though I can't remember what, when I found these.
I scooped up this card, which was not even $5, even though there was really only one charm of interest to me.
This one.

I took this little set home and got to work, combining the charm with chain, which I cut to size, adding the appropriate hardware to make it into a necklace.
I put it together quickly and was very satisfied with the result: a neat project that I'd made myself with a total materials cost of well under $10. Nice!

Over Memorial Day weekend, I happened to be out shopping at Patina, a boutique that sells gifts, stationery and jewelry. I was looking at the jewelry, curious to see if they might have a tree necklace of their own. That's when I spotted these!
I was soooooooooo tempted. I mean, come on, right? These are exactly like the charm on the necklace I had. Same style and everything. I ended up buying a housewarming present to give to a friend while I was shopping at Patina, so I decided it was imprudent to buy these as well.

Something else strange happened while I was at Patina, though. I ran into the nurse practitioner who works with my neurosurgeon! (I've had some pretty serious health issues that resulted in my having brain surgery back in December - you can read any details you want by clicking on the health label). It was so funny to see her outside the hospital. We chatted briefly and introduced each other to our shopping buddies and all was well. As we were about to part ways, the NP said to me, "We'll see you in a couple of weeks." That was the plan: after my diagnostic in early April and a good meeting with the surgeon in mid-April, I had decided that I was ready for my second round of brain surgery. I responded with, "He's not going on vacation during my surgery, is he?"

He was. The NP didn't know at that particular moment; she called me back a few days later and told me that they'd confirmed he wasn't going to be available. When the surgery had been scheduled several weeks before, she'd suggested that there was a "small chance" that the surgeon would be gone. I don't know why that date was offered to me even with that "small chance," because of course, now it has turned into a certainty. I had tried to be cautious about even announcing the date, but when they didn't call me to cancel, I just figured that he'd decided not to go on vacation. Since my first surgery in the fall was cancelled, I had some ideas about how to manage the stress, but it didn't work very well. After a few days of coordinating the three doctors on the team, we've picked a new date in early July. I think it is going to work out fine. But, as you can probably imagine, I basically lost it when my surgery was cancelled.

Answer? Shopping.
I still wasn't that excited about the tree earrings I'd seen at Patina. They were beautiful, but I don't like the wear such big earrings at work because I spend so much time on the phone. Then I had an epiphany! I figured that, if I could find the right supplies, I could actually turn the charm from the earrings into a charm for a necklace. Yay! The next weekend, I actually walked to a different Patina shop that's much closer to my apartment, and scored the earrings.

Then began the mad dash to find the right kind of hardware and chain to match this bright, matte, almost white-ish silver color. It took me quite a bit of searching, but I did find it eventually. I got the hardware above at Michaels. (Seriously. I think they know me there.)

And I got the chain at the Bead Monkey - an independent bead shop located at 50th and France in Edina. I've shopped there before, though this experience was a little bit different. I walked all over the store and looked at tons of interesting things. (I bought a few - stay tuned for more jewelry posts!) They had a display of chain, and I didn't see anything that was the perfect shade of bright, matte silver. I was just about to pay for the other things I'd found when I happened upon a display of sterling silver chains. This was one of them! I'd never worked with chain like this before - where there aren't links to hook the hardware on to. I spoke with the girl working at the time, who sold me the appropriate hardware and told me how to use it. She was completely right and it worked like a charm. I'm totally impressed! I also bought enough chain and hardware so that I could make a second necklace. After all, I have a second charm already and now I have a back up in case I lose the original!

Here I have my two finished tree necklaces - in metals for every mood!

Wednesday, June 12, 2013

Put it all together...

Well, I had this big idea that I was going to do a post for Monday of this week, but it just didn't happen. A weekend that was expected to be crazily filled with plans turned into one big evening (which I'll post more about... sometime), followed by a couple days of stomach-bug and related recovery. ICK! Luckily, I'm doing much better and haven't even had to miss any work... but the blog hit the low end of the priority list this week.

I do have one exciting thing to show you. Over the last several weeks, I've done some posts about new art for my apartment. Today's the big reveal! Here's where the new art is hanging! 

Okay, so here's essentially the "before" shot. If you want to know more about the project involving the clipboards and flashcards, click here. That will give you an idea of the before the before, if that makes any sense. Let's just say its been a bit of an odyssey. 

 And here's the first "after"! If Marv Minnie isn't part of your regularly scheduled program, you can click here if you want to learn more about the painted panel with the number 27 on it.

And if you want to see more of the little birdie (on the sandy brown background), whose caption is, "Live Happy," then click here!


And here is the after after... well, except for the blaze orange dusting mitt taking a rest in the chair. But yes, other than that, this is the finished product. You've already seen the gallery wall in my living room, so I'm looking for a name for this goofy little collection. Hopefully inspiration on that will strike soon!

Friday, June 7, 2013

Dream Come True

Although I might not have written much about it here on the blog, I have an abiding love for Adirondack chairs. It's a classic symbol of summer, and of having nothing to do but hang out. Seriously! Who can do work, or eat a meal, or even supervise a kid playing while sitting in one? Nobody. It's a dream of mine to have my own wooden Adirondack chair - and it just came true!

It's red!

Doesn't it look like the perfect place to sit down and read a book? It seems like a GREAT place to spend the weekend!

There's just one problem...
Yeah... those pictures above were a little bit of a trick. I included the mechanical pencil so you could get a sense of the scale. I scored this teensy little chair for $6 at Patina recently. I love it, and I guess it means the dream has come true - though maybe it's better to think of it as a sign that the dream remains unfulfilled but alive!

Along with the flowers, birds, angel, stones, and the lantern - the tiny chair is part of the collection!

Wednesday, June 5, 2013

Paint Chip Panel

Last year, one of the ways I celebrated Memorial Day weekend was by visiting Crafts Direct, a big craft shop near St. Cloud, Minnesota. I picked up some things that I shared with you back then, but I picked up some other supplies that are still warming the shelves in my study, just waiting for the right inspiration to strike! This year, in honor of having hoarded these materials for an entire year already, I decided it was time to use one!

I bought this 6 inch square wooden canvas. I'm really into the grain of the wood - I think its simple, but very beautiful. 

The back side isn't anything special, but I thought it would give you guys a bit of a sense of the shape. The "canvas" is at least an inch deep! 

I spent a long time wondering what I might like to make out of this panel. I began seeing the "paint chip" effect - otherwise known as ombre - everywhere. A dark color on the bottom, with lighter shades in graded order all the way to the top. I spent a while thinking that I would do something to incorporate this effect into my design, but I had no idea what color I wanted to showcase in its full range. 

Ultimately, the decision about what color to use was actually spur-of-the-moment. Despite my life long devotion to red, and to teal-turquoise-robin's egg and everything in between, I'm actually really into classic blue right now. (You can read more of my thoughts about that regarding my thermostat frame project here.) When I saw that Michaels had their craft paints on sale for $1 each, I decided it was the right time to make a decision and commit. 

These are the shades of blue I selected. The color, Dark Blue, second from the right is actually the same color I had used on the thermostat frame project, so I already had it on hand. You might be wondering why, for an ombre project, I decided to buy four different bottles of paint. Theoretically, one could buy the darkest color and simply add white to reach desired lighter shades. I'll get to that in a minute. But, for now, just know that the decision to go with blue was sealed by the fact that I was very happy with the thermostat frame and that I already had some of that paint on hand.

While I was wandering around Michaels like a doofus, I decided I also wanted to commit to the design that I would combine with the ombre effect. It had never been my plan to just use the colors. 

I had the idea that I might use stickers to mark off a quote that would show up in the bare wood once the ombre was painted on and the stickers were removed. I didn't have anything specific in mind, but while I was wandering the sticker aisle, I found these numeral stickers which were on mega-clearance. I selected 27, which is my birthday and the number of the county where I live, and the closest thing I have to a lucky number. I also picked up a package of letter stickers and spent some more time considering the possibility of using a quote. I didn't have anything in particular in mind, and I was a little nervous that the stickers wouldn't form a strong enough seal with the wood to keep the paint out, so I decided to stick with the 27.

Once the numbers were on the panel, it was time to get out the masking tape. 
I had the idea that, since I had a 6x6 panel, and four colors, that it was going to be really easy to mark off 1.5 inch sections and get rolling. When I measured the panel, I discovered it wasn't quite 6x6 and each stripe needed to be more like an inch and three eights. Grrrr! 

With these first two strips of tape applied, I got right to it! 
It was my plan to use masking tape that made me realize I couldn't just buy one dark bottle of paint and achieve the effect by adding drops of white. Each color would need the chance to dry before the next color up could be painted because the masking tape was covering part of the strip. That's not a huge deal, but I was very worried that I wouldn't be able to make the colors consistently lighter since I'd have to start over each time. That might be the right approach for someone looking for a "dip dye" effect, where the colors blend into one another. I wanted crisp lines and the masking tape made that happen. 

After the navy dried, it was time to pull the tape and get ready for dark blue. 
Notice anything different? Yeah, when I pulled up the tape that defined the top of the navy, it pulled off some of the sticker underneath it. (Aside: if you're considering making something like this, you MUST put the sticker closest to the wood and put the tape over it. Otherwise, in order to pull up the masking tape, you'll wind up pulling off the design.) The same thing happened at the top when I pulled up the tape that defined the bottom of the lightest blue. I got creative with more tape, though, and effectively covered the missing pieces. Though it's not much to look at, it worked! 

Okay, the painting is done. This photo was taken just seconds before the Moment of Truth...

Ta da! It turned out almost exactly as I'd planned. You can see a little bit of trouble at some of the edges, especially on the two. That was too bad, though I guess I can pretend I was going for that
"slightly distressed" look. I'm very, very happy with how the color gradations turned out. The lines are crisp (score!) and the colors are a really nice combo. I guess I should have done a larger piece!

Stay tuned: Next week, I'll be sharing photos of where this piece is currently hanging! 

Monday, June 3, 2013

Sweet Little Bug

Several weeks ago, I was invited to meet up with some of my grad school friends who I don't see very often. The last time we'd gotten together as a group was back at Bee's wedding in January. At that time, one of the girls was about 7 months pregnant. Thankful for facebook, I knew that she had successfully delivered a very happy and healthy little daughter a short time after the wedding! Our group gathering was set up so that the rest of us could meet this little darling! 

I had been invited to a baby shower in honor of this new mama back in January as well. It was a great time, and I happily made a tied fleece quilt and handed it over to the mom-to-be. As the date of this gathering approached, though, I decided I wanted to bring something else when I met the baby for the first time. 

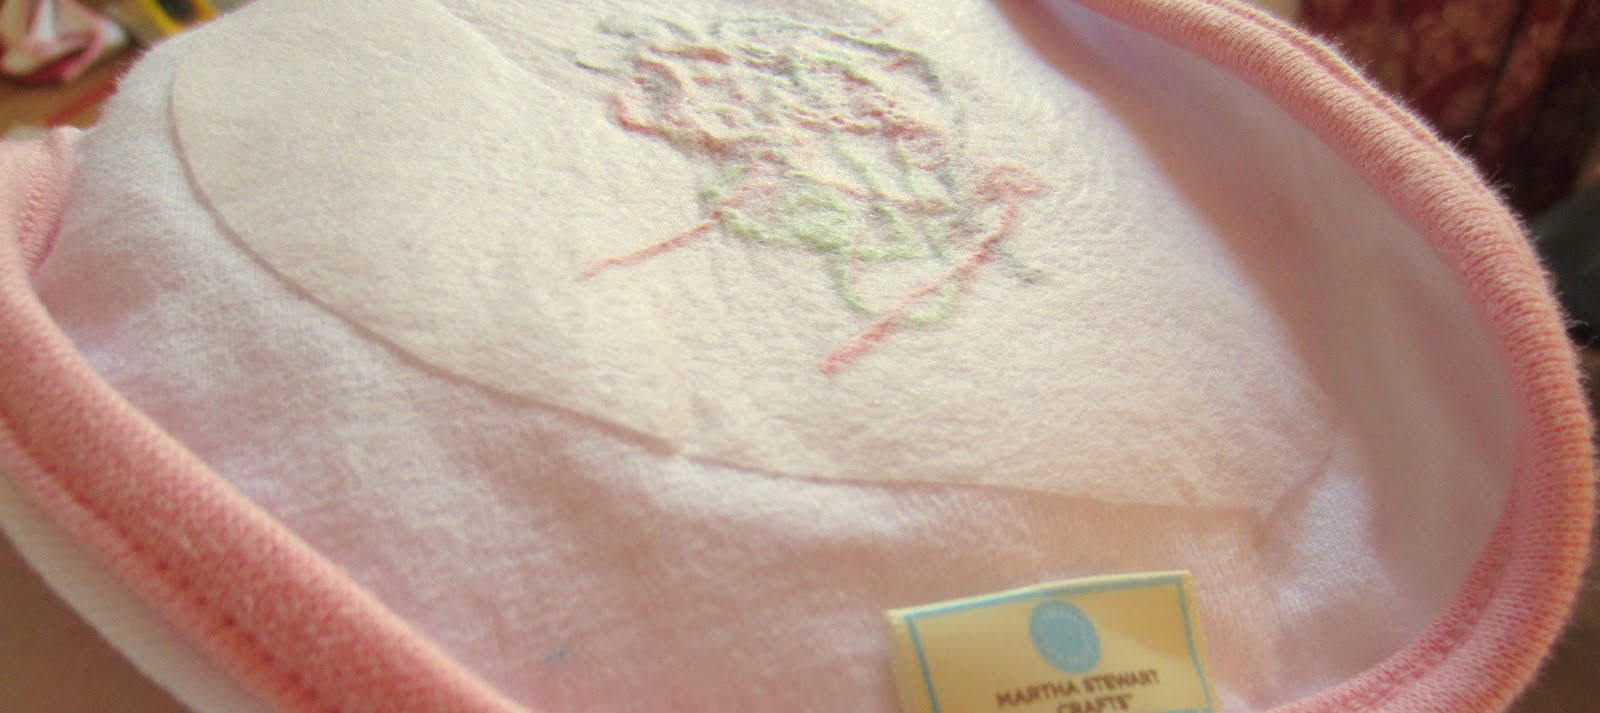
I stumbled upon a kit at JoAnn's, where Martha Stewart had prepared a bib, with instructions and supplies for embroidery. Check! My needle punch project reminded me that embroidery can be kind of fun. Plus, the design on the pattern was relatively simple, so I wasn't terribly worried about getting it done in time. 

Here's the bib to start with. The blue ink will wash away once it's been washed, so there isn't going to be any pre-washing. I unwrapped the brand-new provided embroidery needle (Martha thinks of everything, doesn't she?), snipped some thread off the thread card and got to work! 

After just a few hours of sustained effort - spread across a few days - this was the finished product. Just as I'd hoped! 

The one little snag I encountered was the back side of the embroidery. I'd done embroidery projects before, so I was aware that the back side usually doesn't look nice at all. In fact, it seems to me that it's usually a bit of a mess. I was surprised that Martha also markets kits for onesies and hats, where there's embroidery on the outside and the back of the embroidery is against the baby's skin. Yikes. 

This photo just gives you a little idea about the messiness on the backside. I didn't do as well as I could have keeping these threads organized and short. The kit actually included a second bib, and I did much better when I stitched that one! 

Even though the back of the bib won't be touching the baby's skin, unless Mom and Dad decide to use it, to feed her while she's not wearing a shirt, I was still a little nervous about leaving it. I was worried that something would become snagged in the thread, or it would become snagged in something else, and the whole thing would wind up ruined. 

So, I discussed the matter with my mom, who is an excellent reference for all things sewing. I'd done a little research on the internet about the use of "fusible webbing" to hold things together. When I described what I'd read, she didn't quite know what I was talking about. But, she had another idea and used iron-on interfacing as you can see in this picture and the one above it. She also made some suggestions about how to make the next one look better, and it did, so it was a success all around! 

The next day, I packed it up in the tiniest little bag and we were off. This sweet little bug and I went to meet the sweetest little bug! 

Friday, May 31, 2013

Chop Chop

One thing that I asked for as a birthday gift, and which I was lucky enough to receive, was this little monster! 
This is a KitchenAid 3.5 cup chopper - a little bitty food processor. Until about a month ago, I didn't have a food processor. For a long time, I'd never even considered making a recipe that required the use of a food processor. But, it seems like there are lots of interesting ideas that are Paleo-friendly that pretty much require it. So, with my new food processor in hand, I got cooking! 

First up: Mashed Cauliflower! 
I'm very lazy, so I bought this package of previously-cut cauliflower and steamed it according to the package instructions. Then, I dumped about half the bag in the chopper and went to work. This chopped has two buttons: chop and puree. I started with the chop button, but eventually switched to the puree button. After things were looking smooth, I added some olive oil and seasoning. On my first go around, I used garlic salt. It tasted great when I ate the cauliflower right away but it didn't taste as good after it had been refrigerated and reheated. The next time, I used Mrs. Dash, which held up better! 
Here we are! I have been able to make that one steamed bag into two substantial servings. This is one serving - the chopper is small enough that I'll wind up running only half the cauliflower through at once. While I suppose this doubles the time I spend on the chopping, it doesn't take more than a minute or two. And this chopper, because its so small, easily sits on the counter and is simple to clean and assemble. I wouldn't trade it for a bigger one. 
Here they are, just waiting for meat! 

Next up: Fudge Babies! 
The good stuff is in the bowl - dates, cocoa powder and walnuts! If you're looking for the recipe, click here. I made the recipe by basically dividing the quantities in half. From my point of view, the precise ratio isn't essential, so halving "one and a third cups" wasn't actually the mind-bender it could have been. 

YUM! Pie-shaped fudge babies for the win. It's been a total chop fest here Chez Minnie lately. I hope you're making something good to eat too! 

Wednesday, May 29, 2013

Flashcards

So, quite a while ago, my friend Clover gave me this.
I guess I should've gotten a shot of the side - it's a pile 3 inches high of flashcards. There are pictures on one side with words on the other - the French word, the English word, and the French pronunciation. Clover explained that while she was at work, in the office at an elementary school, a lady came in and donated them. The school didn't want them, but she took them, and gave them to me. Her only comment was, "I knew you could do something interesting and crafty with these." I appreciated her faith in me, and I knew I wanted to do something cool and crafty. But, at first, I had no idea how I was going to make it happen. I let months go by, and then I was struck.
What does this space need? Flashcards, clearly. It took me a while to figure out how I might go about displaying the flashcards. I was browsing at Target not that long ago and noticed that they were marketing a set of three miniature clipboards as picture frames. Those frames were sized for 4x6 photos, but that was definitely the inspiration. I measured the flashcards and then starting doing some online research. I soon realized that memo-sized clipboards would be just the right size for these flashcards. At less than $3 each, I got right over to Office Max and bought 4. And then I went back for 4 more!
Hanging them was actually pretty simple because they're small enough and close enough together that I was able to use my level to level and to measure. Perfection!

The next step was to fuss with the cards to pick an ideal layout. Here's my first draft!

And here's my second draft!
One of the coolest things about the clipboard method is that they can easily be changed around - both with the other cards in the current layout and the cards that remain in the stack, safely stowed in the study. It's very neat!

Plus, given the era when the cards were made, the clipboards are a good style match.
Don't you just want to walk right into this living room? It actually reminds me a little of the living room at my grandfather's house - it's funny how things go out and then come back in! And who wouldn't love that teal color? ;)

And come on, isn't the pronunciation guide hilarious? Mais oui!